A backpack made from leftovers

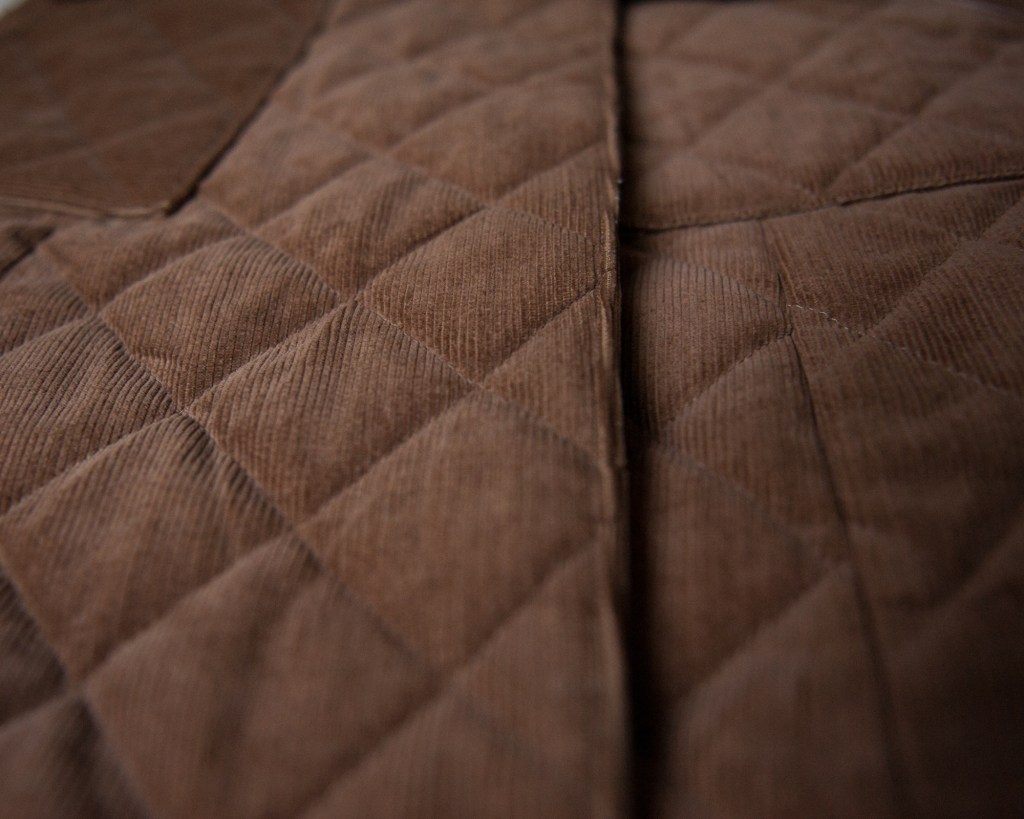
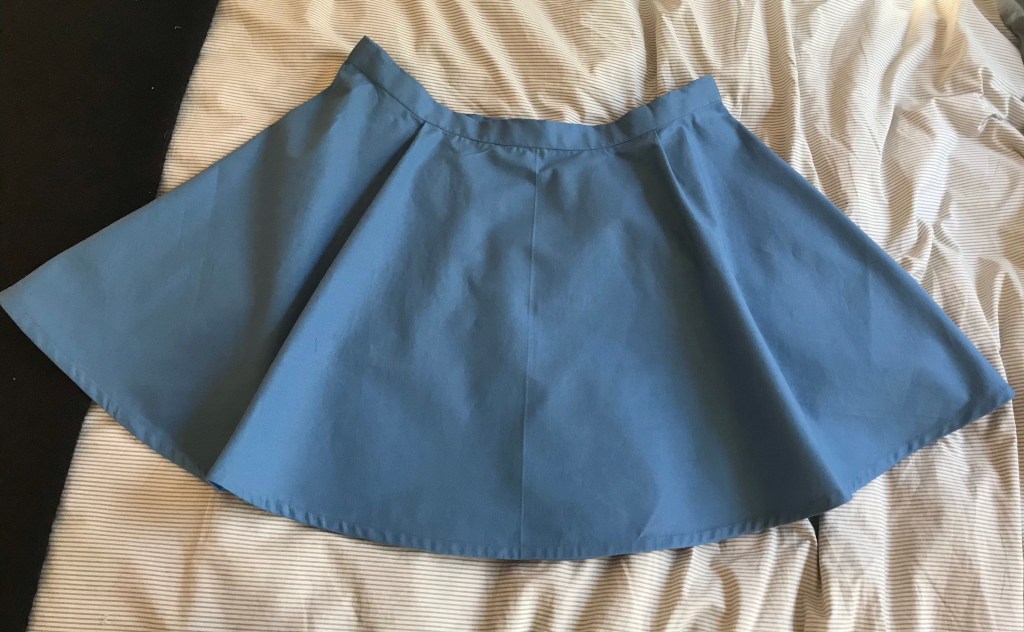
I have wanted to make a backpack for a while now. I finally did it recently. I used only leftover fabrics from my stash. The brown cotton canvas is leftover from my duffel bag made last summer. The jeans fabric is left from a skirt I made last fall (that ended up being too small so I donated it). The lining is from a thrift store. The back pocket lining is a leftover from a fabric I used to sew boxers for the boyfriend and also pillowcases for our bed. Every piece is interfaced (I already had that too). The things I purchased specifically for this project are the black and light beige webbing straps, the metal and plastic snaps as well as the 2 zips. Needless to say this is a cheap costing project.

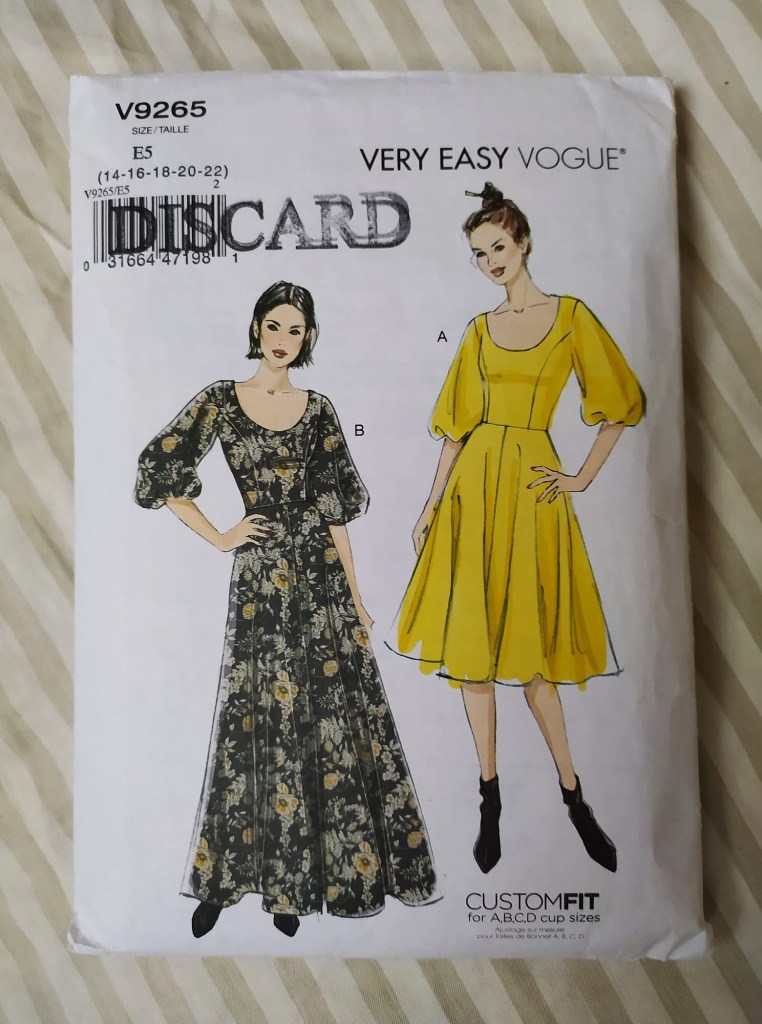
I made this backpack following this tutorial from a youtube channel called sewingtimes. It was easy and easy to follow. A quick and rewarding project, exactly what I needed.
My version is slightly different than the video. I did not do the side opening, I thought it was unnecessary. I prefered to do a hidden backpocket instead (to put stuff you don’t want to get stolen into). It was my first time doing a welt pocket, it’s a bit crooked and funny looking, I will do better next time!

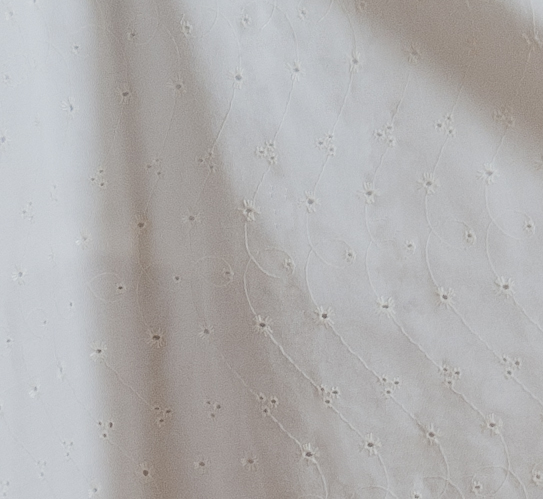
Something else worth noting is the fabric used for the lining was extremely slippery and difficult to work with. To make it easier I used a fabric stiffener and I must admit it’s a total game changer. I will no longer be afraid of working with silk and viscose (or any lightweight slippery fabric really). Mine is from the brand Odif, I heard from other people some brands can be a bit toxic to inhale. The Odif one wasn’t at all. I researched for a long time for such product and I’m really happy with this one. (The commercial minute is over now)

I might change the black straps in the future as the onces in place are a bit fragile. I’m going to position them slightly in diagonal to follow the direction they are taking when I’m wearing the backpack. Other than that, I’m super happy with this bag, I think it’s pretty and cute and perfect for summer (beacause yeah, backpacks = summer, I don’t like wearing a backpack over a big coat).

A (more) casual dress

I purchased the pattern of this dress from McCall’s, it’s the pattern M8083. I liked the raglan puffy sleeves of it. All in all, it was easy to assemble. The raglan sleeves are even easier to stitch than regular type of sleeves. I did do a mock-up to see how the bodice fitted on me, I did a slight adjustment on the front. Instead of being lined, this dress has a facing that is also understitched to make a clean finish, no topstitch is required except for the hem. Important notice, this dress has side pockets!

The cuffs were created not with a cuff piece but with a double elastic casing to create these gathers, ingenious!

I quite like the result, but not that much. If I had to do it again, I would use a different skirt, maybe a half circle. It’s less girly and more feminine, in my humble opinion. There is something odd about the fit, I’m not able to pin point exactly what it is. The result is ok, but not exactly what I expected.

The fabric is from a store called KangaDzungel. It’s a blend of wool and cotton if I recall properly. It’s quite lightweight and flowy. It was very discounted, the price went from 34 euros/meter to 6 euros/meter. (I did enjoy the january sales at my local fabric stores). I needed 2 meters to make this dress.

Even though I sew a lot for myself, I kind of always wear the same clothes, which consists of pants and t-shirts. I wanted to make a feminine dress that I could wear for my everyday life as an attempt to dress more creatively. My next step is to avoid purchasing navy blue fabric (if only you knew how many different dark blue fabrics I have awaiting to be sewn) and integrate more colors to my handmade wardrobe.

A first coat

I love coats. I find that they elevate a look easily when they have classic cut and the right fit. I always thought it was going to be a big and difficult project but I wanted accept the challenge and attempt to make one. To my surprise, it was more manageable than I thought it would be. I used the pattern B6720 from Butterick in digital version. I made the view B, medium length.

I did see the limits of my sewing machine with this project. It had a rough time passing all the layers sometimes required. This machine is not as Heavy Duty as I expected. I made sure to use a jeans needle to sew this project as I was working with a bulky corduroy fabric. Something else that was time consuming was the cutting part. The fabric used was thick with multiple layers so I decided to cut all the pieces one by one instead of two by two when the fabric is folded.

The most arduous part in the construction is to stitch the collar to the back. It’s counterintuitive to stitch two concave corners together, The hem was a bit tricky also, to understand only from the pattern instructions, I had to refer to a tutorial to fully grasp the technique to finish it properly. I joined the sleeves and sleeves linings with a discreet slipstich by hand.

I purchased the fabric in the deadstock section of Abakhan. It was such a nice find and it was the very last coupon left of this beautiful quilted corduroy. The lining is from the same section, some grey quilted polyester.

The total cost of this project is approximately 37 euros. The fabric costed 26 euros for the coupon, it was sold by weight and the lining also sold by weight was around 5 euros. The pattern was on sale for 5$US. The thread was 1.50 euros.

I did do a test wear in the Estonian winter. I went outiside for approximately 20 minutes by -9C and it was keeping me warm enough. I’m very happy with the result, such a unique addition to my handmade wardrobe!

A special occasion dress

This princess bodice dress was made from the pattern V9265 from the Very Easy Vogue collection. It isn’t available for purchase anymore. I got this pattern as a Discard from Fabricville, it was highly discounted. I got this pattern when I was a still a beginner sewist and I didn’t really know how the sizing works for patterns. It’s way too big for me and before I started this project I knew it would require a lot of adjustments.

The first adjustments were made on the bodice. I created a mock up from the original pattern to see which areas were problematic. Once the bodice was validated, the challenge was to adjust the sleeves to fit onto the new armhole size. The technique to adjust a sleeve pattern is to bring the top of the curve (the top of the shoulder) lower. It was my first time using this technique, I must say, it worked quite well!

Then came the skirt. I decided not to do as the instructions say. They suggest making a 4 pannels skirt (2 pannels back and 2 front). In my opinion it is unnecessary and not as pretty as having a single pannel for the front of the skirt. So I decided cut the front skirt pattern on the foldline and supressed 1.5cm (it’s the included seam allowance). Something else I found problematic about the skirt is that the arrow for the grainline is in the center of the pattern piece, this means that the center back is cut on the bias making it slightly stretchy. After the zip is stitched in place, the fabric is puling down around the zip creating folds.

I chose the fabric from the deadstock at Abakhan. It is quite heavy and also drappy. I don’t remember the exact composition of it, I believe cotton and wool. The lining was made with a soft cotton, also purchased at Abakhan.

My boyfriend surprised me with tickets to the Nutcracker that very same night. I could wear my new dress. There is a dresscode for the ballet and opera evenings, everybody was quite elegant!

2 wide leg pantalons

It’s sort of from the pattern V9361 from the Very Easy Vogue collection. I say it’s sort of the Vogue pattern because I made many alterations to the original pattern so it doesn’t really look how it’s supposed to, I drafted the waistband pattern myself and didn’t use the one from the pattern company because it didn’t match the new pants pattern I created with all the alterations. There are 32 steps to assemble this garment.

The zip made me struggle a bit, it took me a while to understand the very unclear instructions and pictures. I used the help of a youtube tutorial to get it in the end. It was my first time performing a zip placket on trousers. I also went and grabbed a pair of pants of my own to look closely how the zipper is installed.

At first, a cotton corduroy was predicted for this garment but I bought cheap fabric by the weight at my local fabric shop to create the mock up. I ended up liking it so much that I used it for a real trouser too! We will call them lounge pants because they are really soft and comfortable, only to wear at home. Another version of the same pants is made with the corduroy, those are more 70’s style.

Sewing with corduroy can be a bit tricky because it is quite a bulky and particular fabric. First thing to do is to prewash the fabric as it is made with non stretch cotton (well mine was, but there are blends with elastane and/or polyester, still, just wash it). It would be preferable to use a Jeans needle on the machine, it is pointier than the universal needle (Jeans needles are good for any projects made with bulky/thick fabrics). Gotta be careful when ironing, it is better to iron the fabric face down and keep the temperature on the lower side to avoid crushing the ribbed piles. It’s very important to cut your pattern pieces on the grain when working with corduroy, the grainline is VERY important.
Which version is your favourite?

Learning tools

Aside from some classes I took this year (4x3h classes), I have been learning a lot from this great ressource that is Internet. Here is a list of the websites, blogs, youtube channels, books I have been using to learn about sewing, new techniques etc.

For garment construction and sewing techniques

No.1 Sewing Times
This is youtube channel by a lady named Nancy Kweon, she is from South Korea. All of her tutos are about creating accessories, bags, pouches, purses, etc. Her videos are detailed and simple to understand. She writes all of the measurements required to cut all the pieces. I used one of her videos to make the brown duffle bag you could have seen in a previous article.

No.2 Couture Enfant et Tricot Débutant
Another youtube channel by a french dad who started sewing for his kids. This channel is in french, my apologies if you don’t speak it, it is my first language and I learned greatly from him. What I liked about his channel is that he explains many techniques and also how to use different pressing foots. I used one of his tutorials to learn how to stitch my very first invisible zipper. Every months he reviews a lot of sewing and diy magazines.

No.3 Evelyn Wood
And yes, another youtube channel, by a lovely australian lady named Evelyn Wood. She is literally a sewing teacher and has been for many years. She explains a lot of techniques and terms that are essential to know to be able to successfully sew stuff. Very good channel for beginners.

No.4 Atelier Saison
Last but not least from the youtube channels, Atelier Saison. It’s quite a particular one because the videos are extremely long (some around 2 hours). They go into each and every step of assembling garments. They do not talk or explain anything really but by observation you can learn a lot from this channel, you are watching professionals at work.. They have shorter videos that explain how to create a sleeve placket or sew a zipper on trousers, for example. It’s one of my favourite channels.

No.5 Mood Fabrics blog
Mood fabrics is a website selling fabrics and accessories. They also have a blog (that helps selling the fabrics obviously) and it’s very well done. They have article about a bit everything, from tips and tricks on how to work with particular fabrics to history of sewing machines, there are also a lot of free pdf sewing patterns (Like this one I’m going to use very shortly). Great learning ressource in my opinion.

No.6 ABC Seams
ABC Seams is a website dedicated to all possible seams and what they are used for. As simple as that.

Patternmaking and fashion design

No1. Zoe Hong
Zoe Hong is from California, Her entire channel is dedicated to fashion design. She also talks a lot about fabrics, woven and knits, etc. fashion illustrations and more. Great ressource overall.

No.2 Patternmaking for fashion design by Helen Joseph Armstrong
I have been recommended this book by a lot of people. Zoe Hong talks about it on her channel, my sewing teacher also recommended it. Other videos I have been watching all over internet talked about it. It’s extensive and pretty complete. It all starts by drafting a basic dress foundation, it consists of a front bodice, back bodice, sleeve, front skirt and back skirt. Once that is done you can use it to create patterns of your liking. It takes you through all the measurements needed to draft your pattern pieces, it has 919 pages in total.

The next book I am looking to purchase is a Swatch book, full of fabric samples.
These are my picks, Internet is an infinite learning tool and there are tons of website and channels dedicated to sewing. If you have recommendations, don’t hesitate to let us know in the comments section.

A summer dress even though it’s not summer anymore

This is the pattern V9100 from the Very Easy Vogue collection, the bodice is custom fit to your chest size with princess seams. I picked the fabric on Abakhan’s website, it’s a cute flower printed cotton. The lining is a leftover from a previous project, only the bodice required lining. It’s important to notice that this dress has POCKETS!

My thoughts about the project are that it was, indeed, quite easy. No steps were very difficult but it does require some basic knowledge to achieve it. It’s not a first project friendlly, it’s meant for advanced beginners. There are 22 steps to assemble this dress together.

I created a mock up for the bodice, to be able to fit it on me before cutting and assembling the real and final dress. Good thinking because the bodice was way too big, at least 2 sizes too large. I could adjust it and make the fit impeccable. The skirt is gathered so the bodice size isn’t important to fit them together. You can see on the picture the top one is unfitted, the bottom one is adjusted, it’s smaller. Once the mock up was validated, I could cut the fabric from the new pattern I created.

Now I just have to wait for spring/summer 2021 to wear it!

Half circle skirt for my mom

My mom has helped me a lot lately and I wanted to thank her by making her a skirt on her measurements. We picked the fabric at Club Tissus on the south shore of Montréal. It’s simply 100% cotton.

I used this wonderful tool to find out the radius needed to trace the 1/4 circle on the fabric folded in 2. Once that was done, I staystitched the waist as some parts are cut on the bias, to prevent the fabric from stretching while working on it. The next step is to stitch the invisible zipper in place and stitch the center back bellow the zip. I also created 2 folds at the waist because it was a little too big, it also created more flare to the skirt.

Then came the waistband. I used fusible fleece to reinforce the band. I stitched the right sides together (of the skirt and the waistband) then folded the waistband and topstitched to finish it. I hand stitched the skirt clip. To finish the hem, I hung the skirt for at least 24 hours for the weight of the skirt to pull down, it’s an important step because some parts are cut on the bias. Then I trimmed the bottom from the floor up. I wanted to lose minimal length so I used bias tape and folded it inside to finish the hem. I find it’s a nice and subtle finishing touch. It’s a very versatile piece to have in your wardrobe. Thanks mom for everything!

Hand stitched decorative pillow

Commonly known as a Canadian Smocking Pillow. I got the idea from Christine McConnell and this video of hers. I don’t yet have a sewing machine at my new place so I thought I could find a project I could do by hand. It was quite easy but time consuming. Here is the final result.

First I found this fabric at a store called Solveig, here in Tallinn. This Velour is made from Cotton and Viscose. It took 150cm by 60cm of fabric. The round pillow was found at a store called Abakhan. They are quite common to find at any crafts or fabrics store.

Next step is drawing the grid on the wrong side of the fabric. Each square is 1 inch square (1″x1″). I drew diagonal lines to indicate the direction of the stitches. The grid looks like this from close up. About 5,5 inches are left on each side of the grid.

After the grid is drawn, it’s time to stitch by hand. I don’t exactly know how much time it took in total, I was working on it sporadically over a few days. The final steps are to stitch the ends together to close the tube, fit the pillow in the tube, make the creases and stitch them all together and finish with a button. I covered the button with the same Velour. Voilà!

If I had to do it again, I would draw the grid and then stitch the tube closed and then stitch the lines in the grid. I thought it was a bit messy to finish the tube after making all the stitches. Just a little tip to make it easier and have a cleaner finished look.

Sewing Projects of Summer 2020

First post yay!

I’ve been sewing quite a bit this summer, I was extatic to bring projects to life and use them for my travels or my everyday life. Here are some of them.

First of them is this duffel bag or weekend bag. I’ve decided to sew it for a vacation at les Iles-de-la-Madeleine my father invited me to. It’s made with cotton canvas found at this wonderful store called Club Tissus on the south shore of Montréal. I was attracted to the color right away and wanted to make a bag out of it. I got help from this tutorial from a youtube channel called Sewing Times. My version of it is slightly larger than hers because the zip I had at disposition was 6cm longer, I also made the handles from the fabric, it took a while longer to do it this way. It’s not exactly like Nancy’s but the base of it is from her video.

I worked on this half circle skirt for quite some time even if it’s supposed to be an easy project. At Fabricville, I found this english embroidery cotton fabric and wanted to use it for a light summery skirt. Of course I added a lining otherwise it would be very transparent. It was my first time stitching an invisible zipper, I was quite successful at it after some attempts. Some parts of it were handstiched around the waistband. I also made a matching scrunchie with the leftover fabric. I’m quite happy with the result, I think it’s super cute!

I found this cute blouse pattern from Burda Style. It was quite easy to make. I decided to do french seams for a nice clean finish. I found this fabric on a website called Swatchon. This is a light blue lightweight cotton. I have a thing for light blue, I don’t know why, I’m fond of them!

Finally this satin top. I bought the fabric last winter, thinking it was pretty but I didn’t know what I was going to do with it. I found a video from this youtube channel called tintofmint. The girl sells the pattern for quite an expensive price in my opinion so I thought I would give it a shot and try to do it myself. Here is the result. I’m quite happy with it though I wouldn’t wear it as it is, some improvements are required but for a first attempt at draping, I must say I’m quite happy!

Those are my 4 projects of summer 2020 (without the countless masks I’ve made for friends and family). A lot of change is coming my way, I’m moving to a new place so I didn’t have much time to sew in the past few weeks, I will get back to it very soon! Thanks for following along 🙂 More content is planned for the future of this blog,